
Creating QR Codes in SwiftUI: A Step-by-Step Guide 2023
March 16, 2023
PouyaSadri
Learn how to easily generate QR codes in SwiftUI with this comprehensive guide. Follow along as we walk you through the process step-by-step, from setting up your project to integrating the QR code generator into your app. With our helpful tips and code snippets, you'll be creating custom QR codes in no time!
Tips
Mobile app development
IOS app
SwiftUI
Looking to create QR codes in SwiftUI using CoreImage? Look no further! With the help of the CIQRCodeGenerator Core Image Filter, you can easily generate QR codes on demand. This powerful framework offers a range of high efficiency capabilities, and we'll be exploring just one of them in this blog post.
To get a better understanding of the process, check out the full tutorial video on YouTube!
Create Your Own QR Code Generator App with SwiftUI: Step-by-Step Tutorial for iOS | 2023
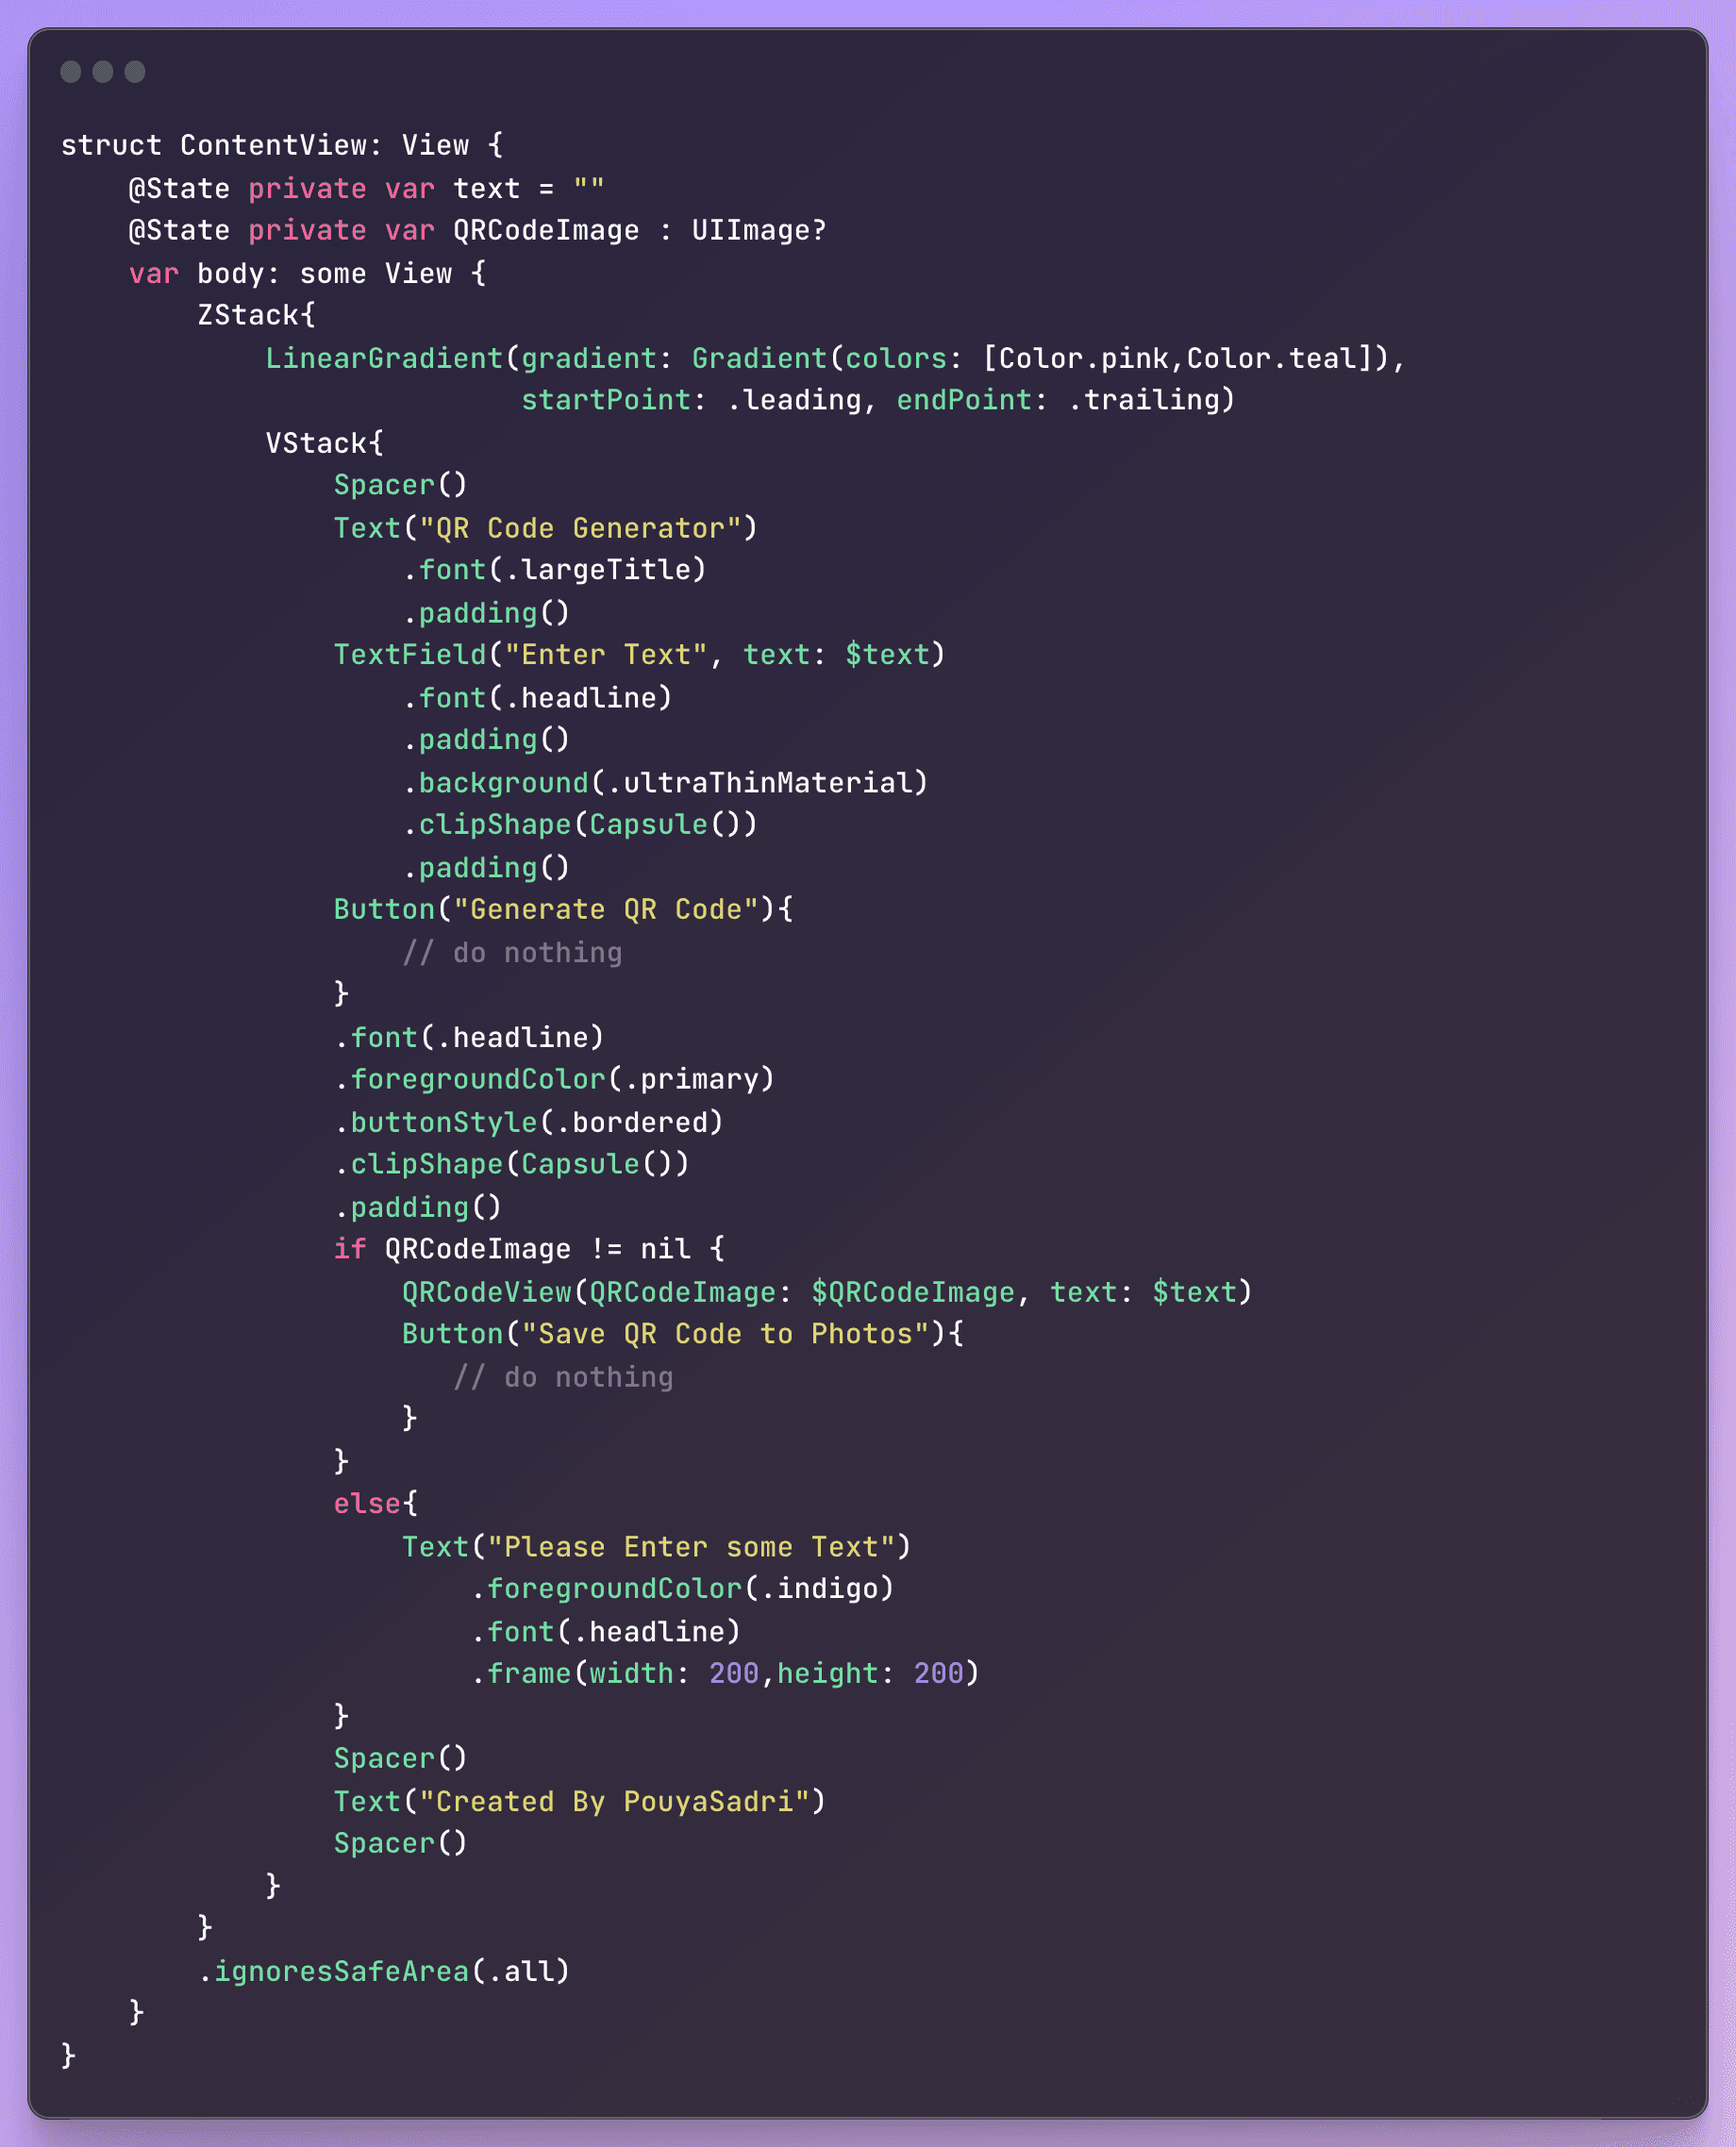
In this step-by-step guide, we will show you how to create a stunning view using a ZStack with a LinearGradient, as well as a VStack that contains a TextField and an ImageView. With the TextField, users can easily input the necessary information, and the ImageView will showcase the QR code generated through the CIQRCodeGenerator filter. This is an essential feature that you won't want to miss out on – so keep reading to learn more!
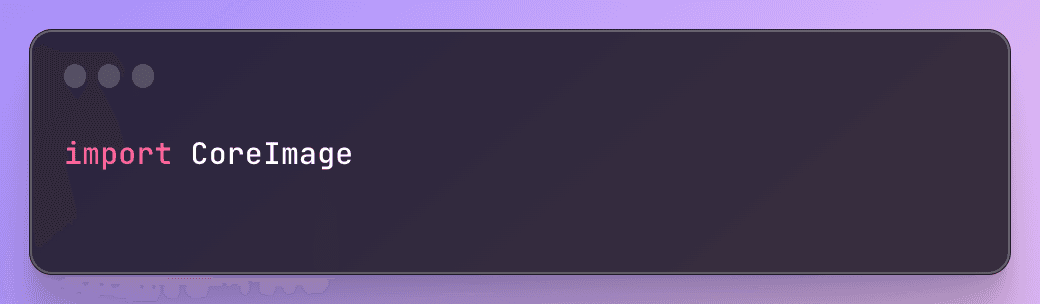
The following step involves importing the CoreImage framework.
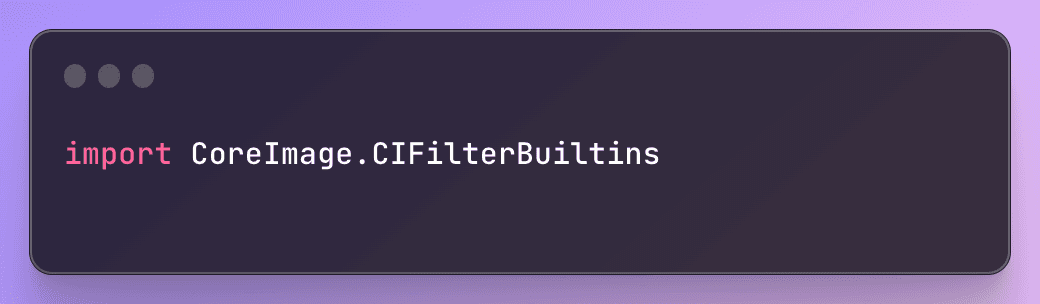
Additionally, we need to import CoreImage's type-safe API to gain access to all of the available CoreImage filters.
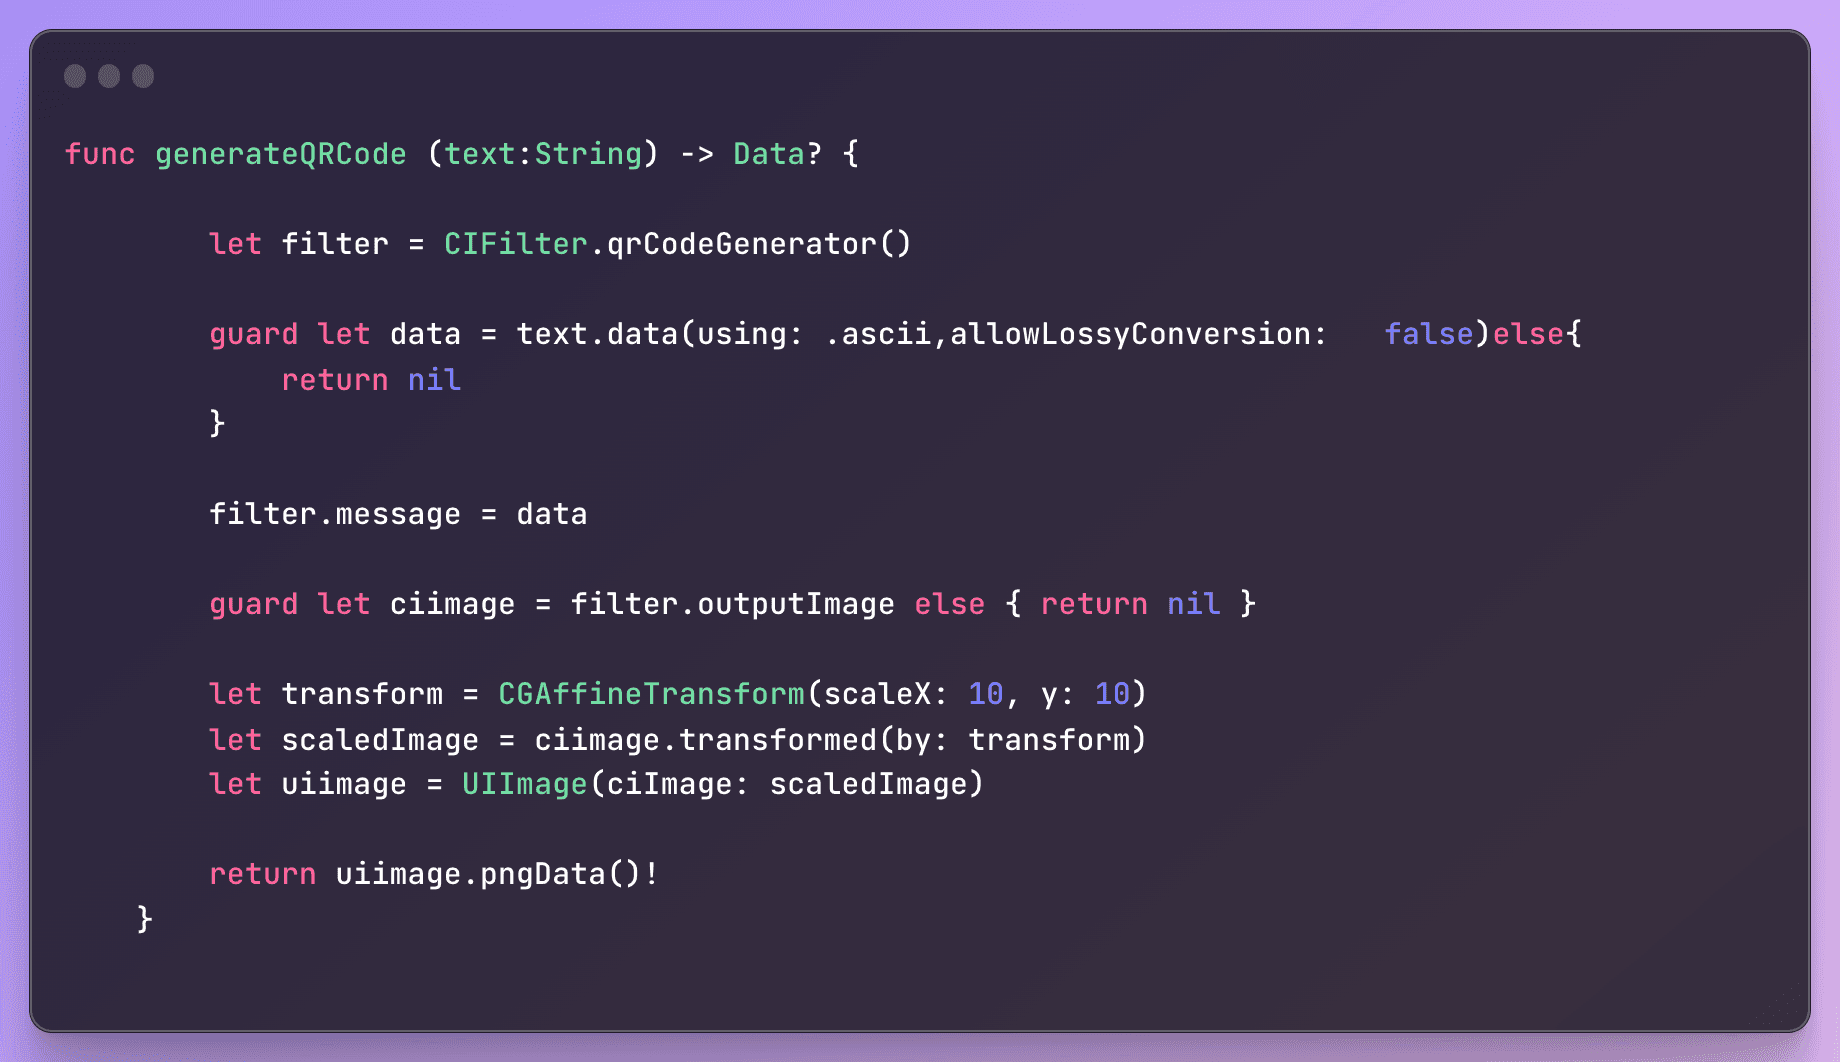
Moving forward, we will define our filter within a function called "generateQR." This function will accept a text string as input and will return an optional Data type.
To create our filter, we'll first define a variable for it. Thanks to our import of "CIFilterBuiltins," we can easily initialize the filter with a single line of code. We'll convert our input text string into data using ASCII encoding, as the CIFilter for QR codes requires a "message" parameter in Data type. We'll pass our converted textual ASCII data into that parameter.
Once our filter is set up, we can obtain the output image by calling "outputImage" on the filter variable. Since this value can be nil, we will safely unwrap it using the "guard" statement.
The generated QR code image will be very small, so we'll need to scale it up. To do so, we'll apply a CGAffineTransform to scale it 10x.
Finally, we'll convert the CIImage into a UIImage and return a PNG representation of the QR code image.
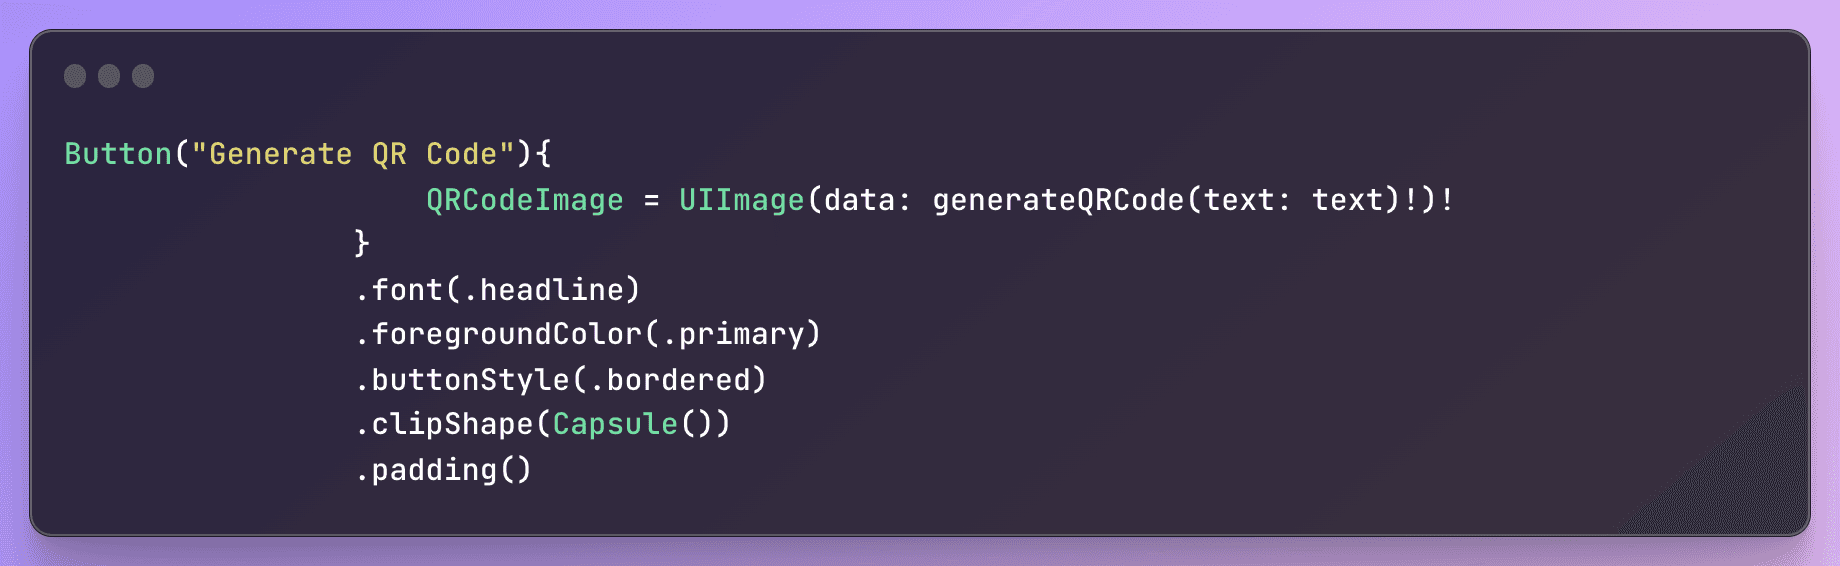
In the next step, we'll update our view to integrate the function we just created in order to display the generated QR code.
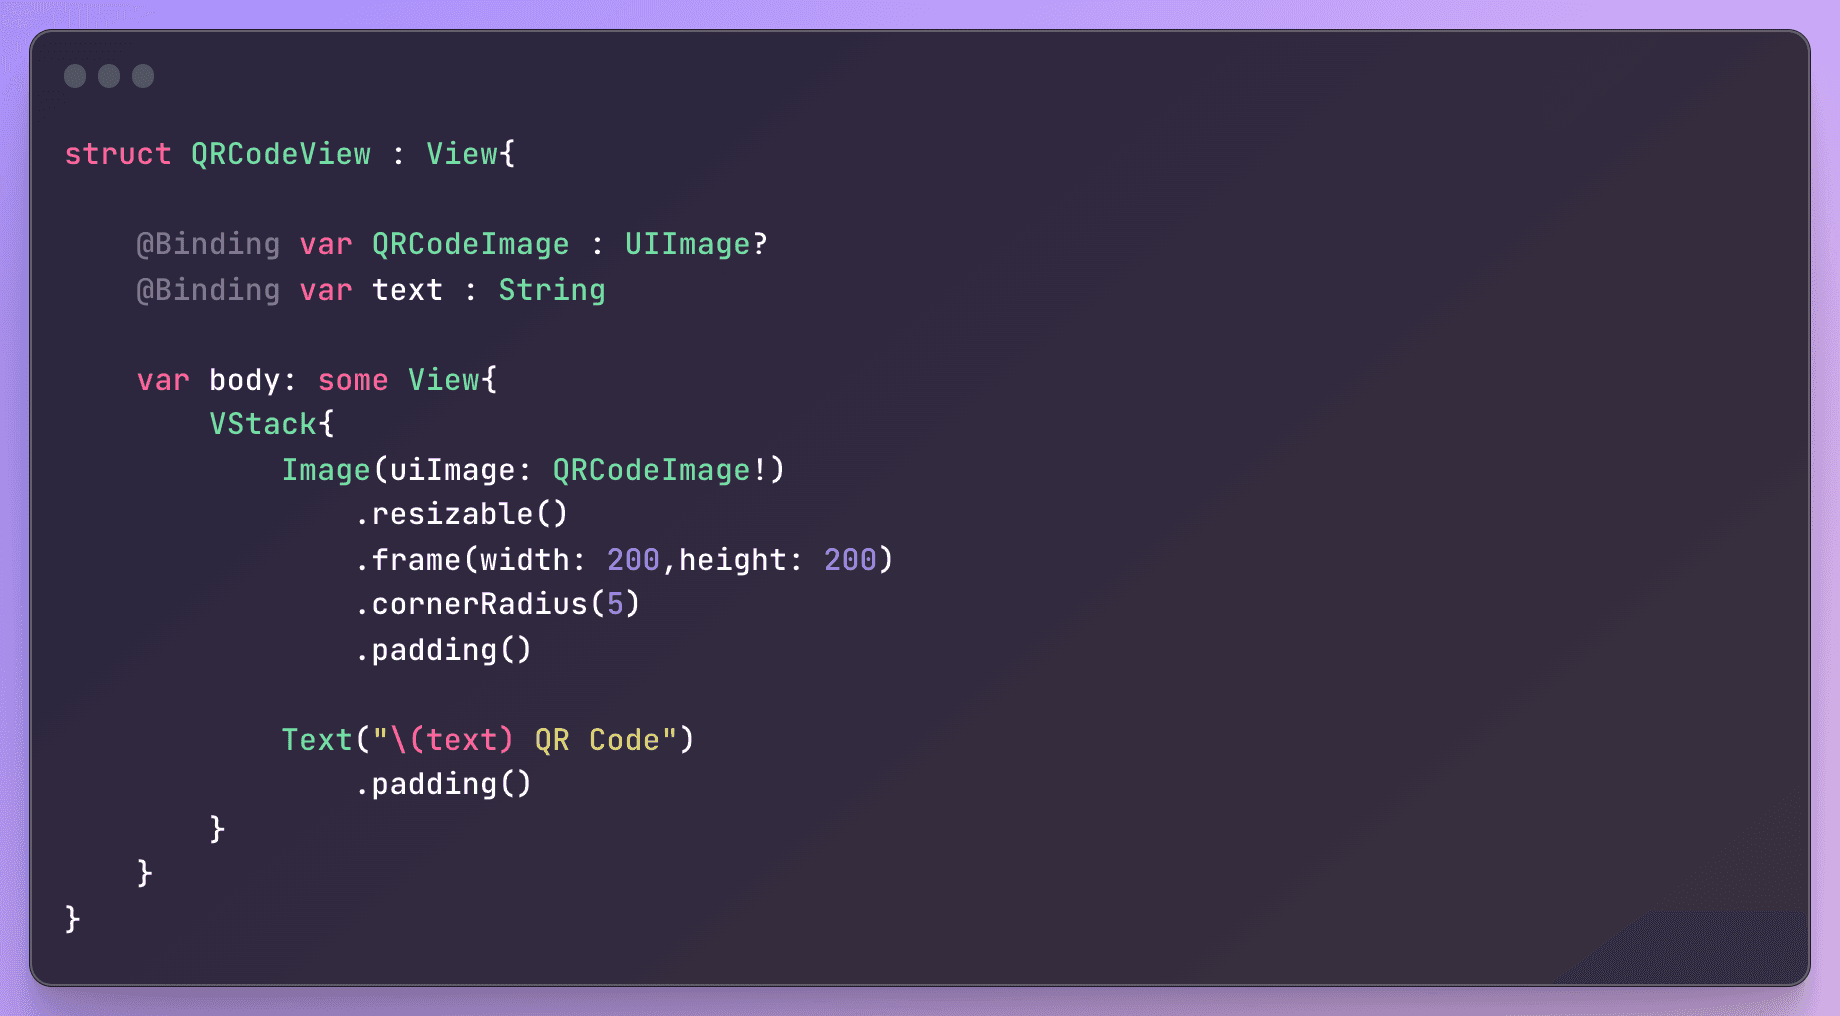
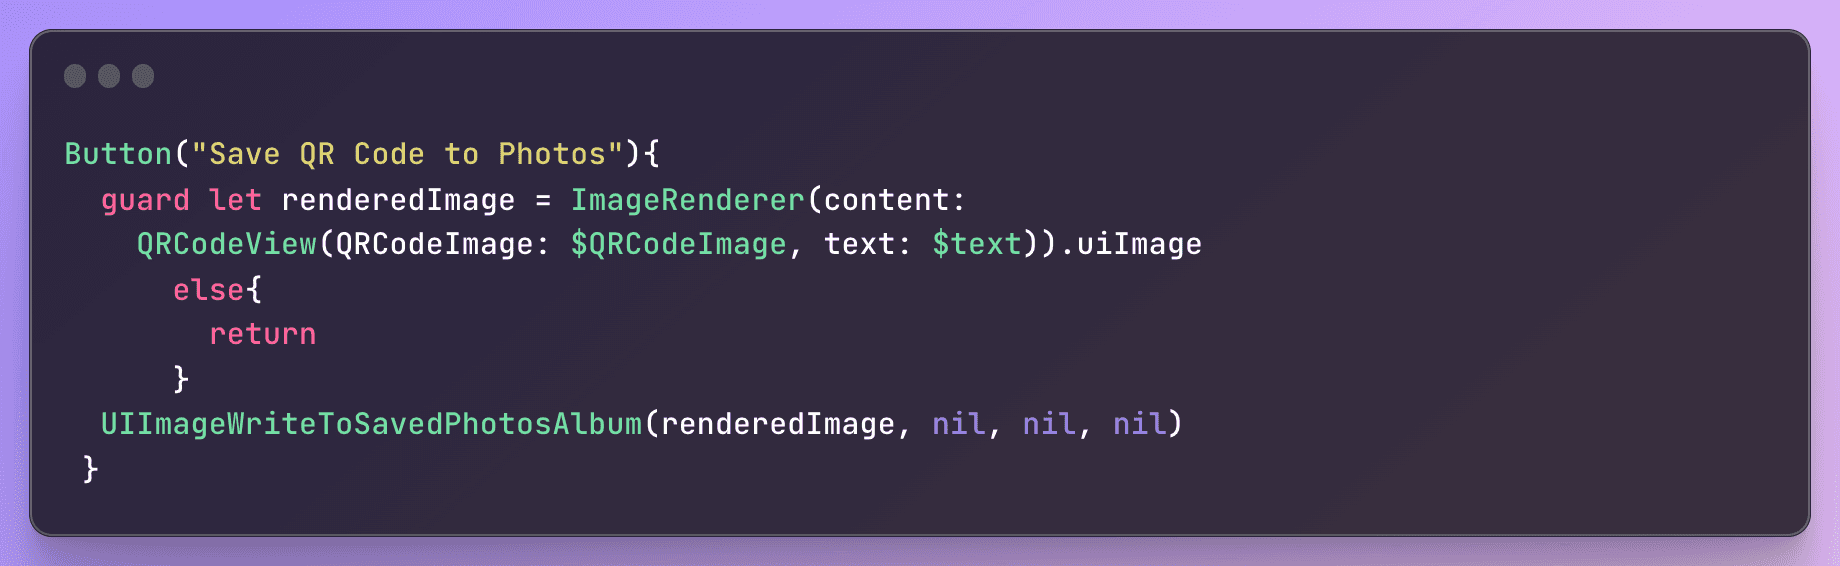
If we want to save the generated QR code within our app to the photo gallery on an iPhone, we can use the ImageRenderer in SwiftUI to render a UIImage from our QRCodeView. Then, we can use the UIImageWriteToSavedPhotosAlbum method to save the QR code image to the Photos app.
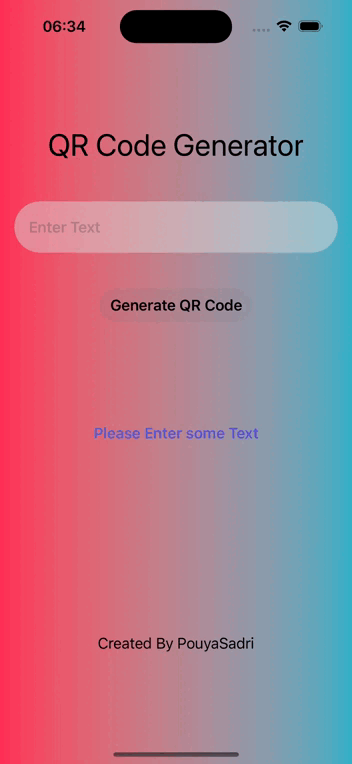
Give the QR code a try with your iPhone's camera app! Also, be sure to check out blog.pouyasadri.com while you're at it 😄